What are Decals for Diecast Models
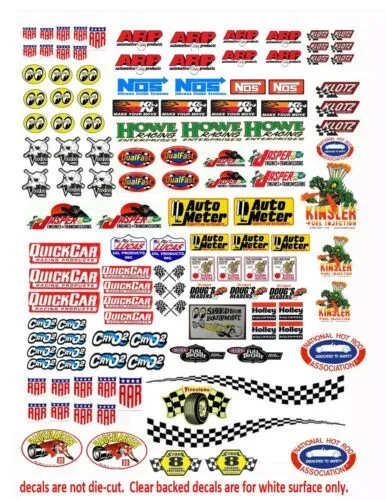
Decals, short for “decalcomanias,” are essentially decorative transfers used to add details, markings, and branding to diecast models. They are thin layers of printed images that can be applied to the model’s surface. These decals are a crucial part of the model car hobby, allowing enthusiasts to replicate real-world vehicles with incredible accuracy or create unique custom designs. Decals are available for various model scales, vehicle types, and manufacturers. They can feature anything from sponsor logos, racing stripes, and license plates to intricate details like dashboard gauges and warning labels. Decals truly bring diecast models to life, enhancing their realism and aesthetic appeal. The art of applying decals properly is a skill that many model builders take pride in, as it can significantly impact the final appearance of a model.
Types of Decals for Diecast Models
Understanding the different types of decals available is essential for choosing the right ones for your diecast model project. Each type has its unique application method and characteristics. The most common types are water slide decals, dry transfer decals, and self-adhesive decals. The choice of which decal type to use often depends on the complexity of the design, the desired level of detail, and the modeler’s skill and preferences.
Water Slide Decals

Water slide decals are the most widely used type for diecast models. These decals consist of an image printed on a thin, transparent carrier film. To apply, you soak the decal in water, which loosens the image from the backing. The image is then slid onto the model’s surface and positioned. Water slide decals are known for their ability to conform to complex curves and details, making them ideal for most applications. However, they can be more delicate and require careful handling to avoid tearing or damage. They also require the use of setting solutions to ensure they adhere correctly and settle into the model’s surface. Image: water-slide-decals.webp
Dry Transfers
Dry transfer decals offer a different approach. These decals are applied by rubbing the image onto the model’s surface. The image is transferred directly from the carrier sheet to the model without the use of water. This method is generally more precise and easier to handle than water slide decals, particularly for small or intricate details. Dry transfers are also less prone to silvering (air bubbles trapped under the decal) and can work well on textured surfaces. The main disadvantage is that they may not conform as easily to curved surfaces and can be more challenging to reposition if applied incorrectly. Image: dry-transfer-decals.webp
Self-Adhesive Decals
Self-adhesive decals are the simplest type to apply, featuring a pre-applied adhesive backing. You simply peel the decal from its backing sheet and stick it onto the model. These decals are convenient and quick to apply, making them suitable for beginners or projects where speed is essential. However, they may not conform to complex curves as well as water slide decals, and the adhesive can sometimes be visible around the edges. Self-adhesive decals are best suited for flat surfaces and straightforward designs. Image: self-adhesive-decals.webp
Essential Tools for Decal Application

Having the right tools is critical for achieving professional-looking results when applying decals to your diecast models. Some essential tools will make the process much easier and improve the final outcome. These tools will help with precision, handling, and ensuring the decals adhere smoothly and seamlessly. Gathering these items beforehand ensures that you are ready for the decal application process.
Tweezers
Tweezers are essential for handling small decals and positioning them accurately on your model. Choose a pair with fine, pointed tips for precise control. Tweezers allow you to grab, lift, and maneuver decals without touching them directly with your fingers, which can transfer oils and potentially damage the decal. They are especially helpful when working with tiny details or complex designs. Image: tweezers-for-decals.webp
Hobby Knife
A sharp hobby knife is needed for cutting decals from their backing sheets. It’s important to trim the decals close to the image to eliminate any excess carrier film, which can be noticeable after application. Use a fresh, sharp blade for clean, precise cuts. A hobby knife is also helpful for lifting edges of decals, correcting positioning, and removing any unwanted debris. Image: decal-application-tools.webp
Softening Solutions

Softening solutions, also known as setting solutions, are crucial for ensuring decals conform to the model’s surface, especially on curved or uneven areas. These solutions soften the decal, allowing it to become more pliable and settle into the details of the model. They also help to eliminate air bubbles and improve the adhesion of the decal. Common brands include Micro Set and Micro Sol, which are used in combination. Using softening solutions will create a professional finish and integrate decals seamlessly with the model’s paintwork.
Decal Setting Solution
Decal setting solutions are chemical solutions designed to help decals adhere to the surface of the model. They are used to soften the decal and help it conform to the model’s surface, especially on curved or uneven areas. They can also help to remove air bubbles and improve adhesion. A setting solution helps to make the decal look like it is painted onto the model and less like a sticker. When the solution dries, it will securely attach the decal to the model.
Top 7 Tips for Decal Application
Applying decals to diecast models can be a rewarding experience, but it requires patience and precision. Here are seven essential tips to help you achieve professional-looking results.
Prepare the Surface

Before applying any decals, ensure the model’s surface is clean, smooth, and free of dust, fingerprints, and any imperfections. You can gently clean the area with a soft cloth or a mild degreaser. If the surface is rough, lightly sand it and then re-prime and paint it to provide a smooth base for the decals. This preparation step ensures the decals adhere properly and look their best. Image: applying-decals-diecast-model.webp
Cut Carefully
Using a sharp hobby knife or a pair of small, sharp scissors, carefully cut out each decal from the sheet. Trim as closely as possible to the image, leaving a minimal amount of clear carrier film around the edges. This helps to prevent the edges of the decal from being visible and improves the overall appearance. Precise cutting is a key factor in a professional finish.
Soak and Slide
For water slide decals, submerge the decal in lukewarm water for the recommended time (usually 10-30 seconds). Once the decal is loose, gently slide it off the backing paper and onto the model’s surface using tweezers. Work slowly and carefully to avoid tearing the decal. If the decal sticks to the backing or folds over, be patient and try again. Avoid using hot water, which can weaken the adhesive.
Position Precisely
Using tweezers or a soft cloth, carefully position the decal in the desired location on the model. Take your time and make sure it is aligned correctly before it adheres. If necessary, you can gently slide the decal around with a wet brush or your fingers until it is perfectly positioned. Once you are satisfied, gently press down on the decal with a soft cloth to remove excess water and air bubbles. Make sure the decal is centered before applying the setting solution.
Remove Bubbles
After positioning the decal, use a soft cloth or cotton swab to gently press out any air bubbles trapped underneath. Start from the center of the decal and work outwards. Be careful not to tear the decal. If bubbles persist, you can carefully pierce them with a hobby knife or needle and then press them out. Removing the bubbles will prevent silvering and ensure the decal looks smooth and professional.
Use Setting Solution
Apply a setting solution to the decal after it has been positioned and any air bubbles have been removed. Setting solutions, like Micro Set, help the decal adhere to the surface and conform to any curves or details. They soften the decal, making it more flexible. After applying the setting solution, gently press the decal down with a soft cloth or cotton swab to ensure it adheres correctly. Allow the setting solution to dry completely before moving on to the next step.
Seal the Decals

Once the decals are completely dry, protect them with a clear coat or sealant. This step helps to seal the decals, protect them from damage, and blend them seamlessly into the model’s finish. Apply the clear coat in thin, even layers, allowing each layer to dry before applying the next. This will create a uniform appearance and preserve the decals for years to come.
Common Decal Mistakes
Even experienced modelers can make mistakes when applying decals. Some common errors include applying decals to a dirty surface, not cutting the decals closely enough, trapping air bubbles, and using the wrong type of setting solution. Rushing the process or trying to handle too many decals at once can also lead to mistakes. By being aware of these common pitfalls, you can avoid them and improve your decal application skills. Take it slow and steady.
Troubleshooting Decal Problems
If you encounter problems with your decals, such as silvering, tearing, or poor adhesion, there are usually solutions. For silvering, try using a setting solution or piercing any trapped air bubbles with a needle. If a decal tears, you can often repair it by carefully repositioning the torn pieces or using a small piece of a spare decal. Poor adhesion can be caused by a dirty surface or lack of setting solution. Always double-check the decal, surface, and application process. If issues continue to occur, check the manufacturer’s guidelines or other online sources for solutions.
Where to Find Decals for Diecast Models
Decals for diecast models are available from various sources, including hobby shops, online retailers, and specialist decal manufacturers. Hobby shops often carry a wide selection of decals for popular models and scales. Online retailers, such as eBay and Amazon, offer a vast range of decals, including both generic and custom-made options. Specialist decal manufacturers provide high-quality decals for specific models, liveries, or custom designs. Searching online will help you to find specific decals, brands, and retailers. Many model car clubs and communities can also be a great source of information, inspiration, and even decal trading. Research different suppliers and check the quality of the decals before making your final purchase.